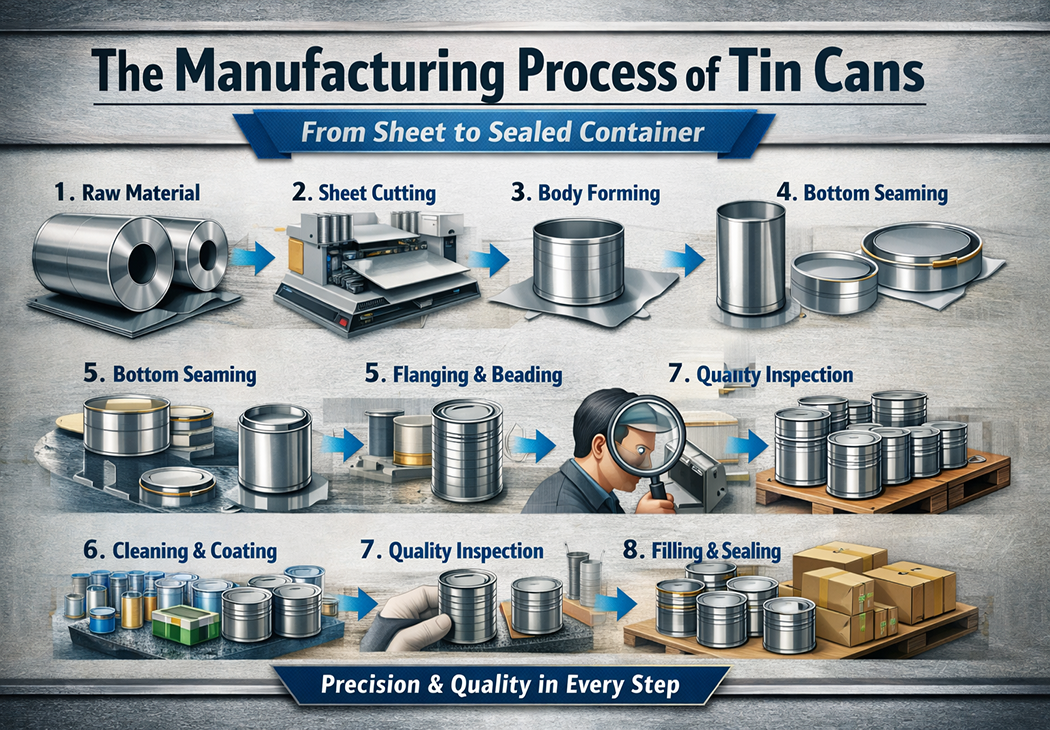
Tin cans are widely used for packaging food, oil, paint, chemicals, and many other products due to their strength, durability, and recyclability. The manufacturing process involves multiple precise steps to ensure quality, safety, and long shelf life. Here’s a detailed look at how tin cans are made:
The process begins with tinplate, which is thin steel sheet coated with a layer of tin. This coating protects the steel from corrosion and makes it safe for food contact. The tinplate is supplied in large coils or sheets.
The large tinplate sheets are cut into smaller rectangular pieces based on the required can size. This step ensures uniform dimensions and reduces material wastage.
The cut sheet is rolled into a cylindrical shape to form the body of the can. The edges are joined using welding (for 3-piece cans) or by drawing and ironing (for 2-piece cans). The welding process creates a strong and leak-proof side seam.
Once the body is formed, one end (bottom lid) is attached using a double seaming process. This ensures an airtight and secure seal, preventing leakage and contamination.
.png)
The top edge of the can is flanged outward to prepare it for lid attachment after filling. Beading may also be added to strengthen the can body and improve stacking strength.
The cans are thoroughly cleaned to remove oil and residues. An internal protective lacquer coating may be applied to prevent chemical reactions between the product and the metal. External printing and coating are also done at this stage for branding and labeling.
Each can undergoes strict quality checks, including leak testing, seam inspection, and dimensional accuracy verification. This ensures durability and product safety.
After manufacturing, the cans are sent for filling with the product. The top lid is then sealed using a double seam process, making the container airtight and ready for distribution.
Finally, the sealed cans are labeled, packed into cartons, and prepared for shipment to retailers or bulk buyers.